Here is our completed preliminary task!
Monday, 22 October 2012
Sunday, 21 October 2012
Editing Our Preliminary Task!
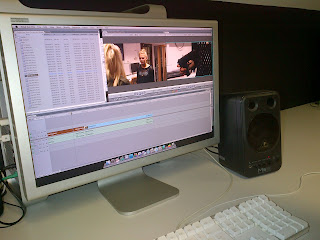 |
| Final Cut Pro |
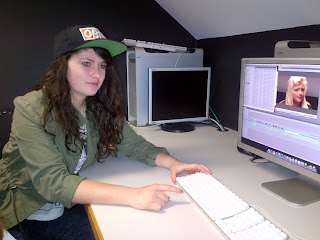
Learning to edit was not as difficult as I thought it would be. Our group (Simon, Leila and I) had all edited a bit before, but never with Final Cut Pro. We were taught how to Check In, by signing in to the Final Cut Server. From there, we retrieved our footage in the folders marked with our names. It was very organized and useful to have the Server! We checked out our footage to the desktop, and from there we were ready to begin editing.
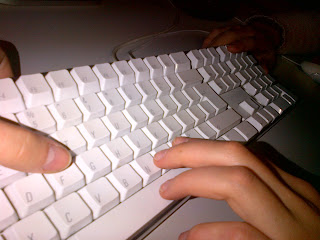 |
| Using Keypad Shortcuts |
To organise the shots, we made a Rush Bin and a Log Bin. The Rush Bin is where we copied the all of the shots that we had, to keep them organized. The Log Bin was where we copied the takes that we actually used in the editing process. It was important to copy the shots and not just drag them in, in case we forgot to save or accidentally deleted something.
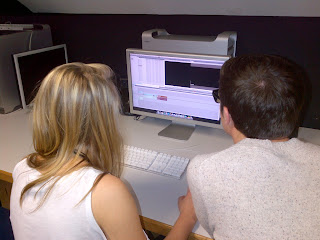 |
| Simon And Leila Editing |
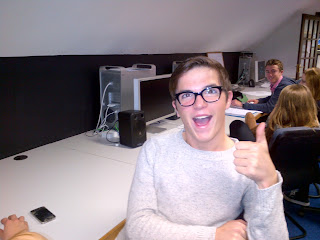 |
| Simon Loves to Edit! |
Although we all agreed that the editing process went well, next time we thought we would be faster and more familiar with the technology. I most enjoyed watching
back the footage and deciding what to copy to the Log Bin. Seeing what we had filmed before was
interesting to me. Watching the
finished product was interesting and satisfying.

Saturday, 20 October 2012
Sound Use in Hanna
The
combination of diegetic and non-diegetic sound allows us to perceive Hanna as a
skillful, trained agent and ultimately as the protagonist. The harsh buzzing in the cell
(amplified) as well as the fact that the woman says “You’re in a safe place,
sweetie,” while being fed lines through a walkie talkie/earpiece leads us to
believe that in fact she is not in a safe place, that she must try to escape
the cold, bare cell. The metallic
thud and heavy amplified synchronous sound of the cell door let us know that
escaping the cell would be difficult.
The non-diegetic soundtrack that begins to play after Hanna cracks the
woman’s back is fast-paced, emphasizing the urgency of her situation.
Friday, 19 October 2012
Thriller Idea Pitch FEEDBACK
Today,
we presented our thriller concept to Matt and Simon. Their initial reaction was that it was a cool idea, quite
basic and out of the ordinary.
Their main criticisms were that the boy (murderer) had too much screen
time, which would make the audience emphasize with him. I agreed with this point, however, the
point where he is walking around the suburb is a large part of the
concept. A solution to this might
be only staying with the perspective of the killer. We could give him positive
characteristics to experiment, to see if the audience can sympathize with a
murderer. I really like this idea; I hope we get a chance to try it.
A
different direction we could take would be that we don’t know IF he has killed
anyone, we can only suspect. It
would create suspense, a great addition to any thriller!
Another
criticism that Matt had was that we might have too many locations. This would make it inconvenient to film
and also that there would be too much going on. By limiting the locations, we could focus more on the
filming, editing and mise-en-scene.
An
important part that they mentioned was the actor for the mother. She would need to be very skilled and
to have the “mum-look”, otherwise it would ruin a substantial part of the
scene. He said, “You can’t have
some Hollyoaks girl play the part, it has to look believable!” which we thought
was quite funny. It’s a difficult
role that we would be asking them to play because it is unusual.
They
thought that the story was interesting.
As our society is familiar with school massacres, it would show a
different perspective with the mother.
A negative side of this was that it would turn into more of a drama,
rather than a thriller. Adding a
voiceover of the boy’s thoughts would bring back the thriller mood; we could
emphasize his mental characteristics in this way.
Matt
and Simon stressed that in order for the opening sequence of a film to work,
one must film “choice shots”. These are the shots that stick with the audience,
even after the movie.
Here is a choice shot from one of the films that inspired our thriller:
Here is a choice shot from one of the films that inspired our thriller:
Thriller Idea Pitch
The idea that Simon, Leila and I
decided to present to Matt and Simon was our concept of a boy walking home from
school after having committed murder at his school. He was meant to be the perpetrator of a school
massacre. The sequence would be
filmed mainly from the point-of-view of the mother. As he walked home on a sunny (probably winter as we’ll be
filming in February) day, contrapuntal music would be playing, or birds would
be singing to add to his twisted character. He would look disheveled and have blood on his hands. During
this time, his mother would be seeing the massacre reported on the news. Her
reaction would be shocked and fearful for her son, not knowing that he was not
the victim. He would then come up
to the door, she would ask how he wasn’t at school, and he would reply,
“School’s cancelled today,” or something else creepily.
We were
inspired by the movie “We Need To Talk About Kevin” and a clip that Simon
showed us from “United States of Leland”.
What we liked
in the opening sequence of “United States of Leland” was the crane shot going
over, as well as the peaceful setting of the suburban area.
We
chose this idea to pitch because we thought it would be an interesting
perspective on school violence. We liked the juxtaposition created by the
violent act and suburban life. We
felt that the concept was simple enough to be filmed well, and that although it
was about violence, nothing violent would actually need to be filmed. Hope it will be received well!
Opening Sequence
The opening sequence is an integral part of a film. It foreshadows main events, sets the time and place, can introduce characters, and indicates the type of thriller. It mainly does this through the mise-en-scene (showing location, signifiers such as weaponry, people such as detectives or spies), but also through the other three technical areas. Camera, through close-ups, dutch angles, or extreme close-ups, create meaning and can distort the images in an interesting way, creating tension or confusion, both integral to the creation of a thriller. Sounds are can create meaning as well, through non-diegetic sounds such as tense or frightening music and sounds effects (shatter, high-pitched noises) or synchronous diegetic sounds to match the thriller-type action on screen (explosions, gunshots, screams). The editing can be very effective in creating a thriller atmosphere in the opening sequence, by quick cuts, the text of the credits, flashbacks, different washes (black and white, shatter effects...) as editing creates meaning by putting the images together.
 |
| The surveillance camera wash gives a trapped/watched feeling, creating tension and suspense. (Film: Quarantine) |
The main title sequence indicates the types of characters and the setting of the film. It creates verisimilitude in the opening minutes of the film. This is done through editing for perspective and camera angles, which may indicate what type of character we are seeing (spy, police officer, victim...) by showing things from high angles (looking down as antagonist) or low angles (victim) or through eyeline match (a police officer seeing a crime). Sound can characterise through non-diegetic music, for example dark, loud music for an antagonist. Sound also sets the scene, for example using ambient sounds of wind or people talking to show either a remote place or a city.
 |
| The ambient sounds of wind on a mountain are interrupted by an explosion! |
Learning to Use the Camera
Today, we learned how to use the camera in the film
studio. The cameras we were
learning to use were the Sony NX5:


Next, we got the camera out of the padded case and attached
it to the tripod, which was also quite easy. To do it, you just needed to slide the camera on the base of
the tripod while holding down the top button and wait to hear the click.
After the camera was securely on the tripod, we put the
battery into the battery compartment and were instructed how to open and close
the lens. I found the lens shutter
switch to be very entertaining!
Now was the time when we actually turned on the camera. The small red “ON” button was difficult
to find, which was a good innovation, so that one doesn’t accidentally press it
while filming.
To make sure that the camera would shoot on-level, we had to
“bubble” it. The small green disk
on the tripod, which had a small bubble in it was the tool to do this
with. When the bubble was in the
middle of the small circle, it would be centered. We took a lot of time to do
this; it was tedious but of course essential for filming.
We learned how to white-balance, which means that we matched
the light perceived on the camera to the actual light, so it wouldn’t turn out
a different/dull colour. To do
this, we used Simon’s shirt (which was white) and pressed the small
white-balance button on the left hand side of the camera. There was also a large sheet-like disk
used for white balancing, which would be useful when filming, so that the film
crew doesn’t have to hunt down something white to balance to! We experimented
balancing indoors and outdoors, looking at how different lights could be
used.
 |
| Examples of White Balancing |
There were a lot of intimidating buttons on the camera, but
by the end of the lesson, we were familiar with almost all of them. The dials near the lens of the camera
were important to know how to use.
There were three dials: zoom, focus and exposure. The zoom one was evidently for zooming
in and out. The focus was to focus the camera, so it wouldn’t be blurry. To do
this, we needed to zoom into whatever we were about to film, focus on it, and then zoom back out to the range we
would be shooting at. It made for
a very clear picture. The exposure dial was to change how bright the scene was,
but we didn’t really use it since we had our light sorted out with the
white-balance.
An interesting thing that we experimented with, with the
cameras was the use of shutter speed.
By changing the shutter speed on the display screen, the quality and realistic
look of the film was dramatically altered. Increasing shutter speed made for a surreal effect,
everything being very defined and quick. Matt waved his hand in front of the
camera fairly quickly at shutter speed 215, which made it look like his hand
just had a ridiculous amount of fingers.
Decreasing the shutter speed made the film look very low quality,
everything in slow motion. The
optimal shutter speed is 25 frames per second.
 |
| An Interesting Example of Shutter Speed |
I found it really fun and interesting to be learning how to
use the cameras! It was fascinating to see all the things the cameras could do,
all the different ways they could be experimented with. It was a nice change from staying in the classroom as well!
Subscribe to:
Posts (Atom)